服务器开发者
开始构建您自己的服务器,以便在 Claude for Desktop 及其他客户端中使用。
在本教程中,我们将构建一个简单的 MCP 天气服务器并将其连接到主机,Claude for Desktop。我们将从基本设置开始,然后逐步进入更复杂的用例。
我们要构建的内容
许多 LLMs 目前无法获取天气预报和恶劣天气警报。让我们使用 MCP 来解决这个问题!
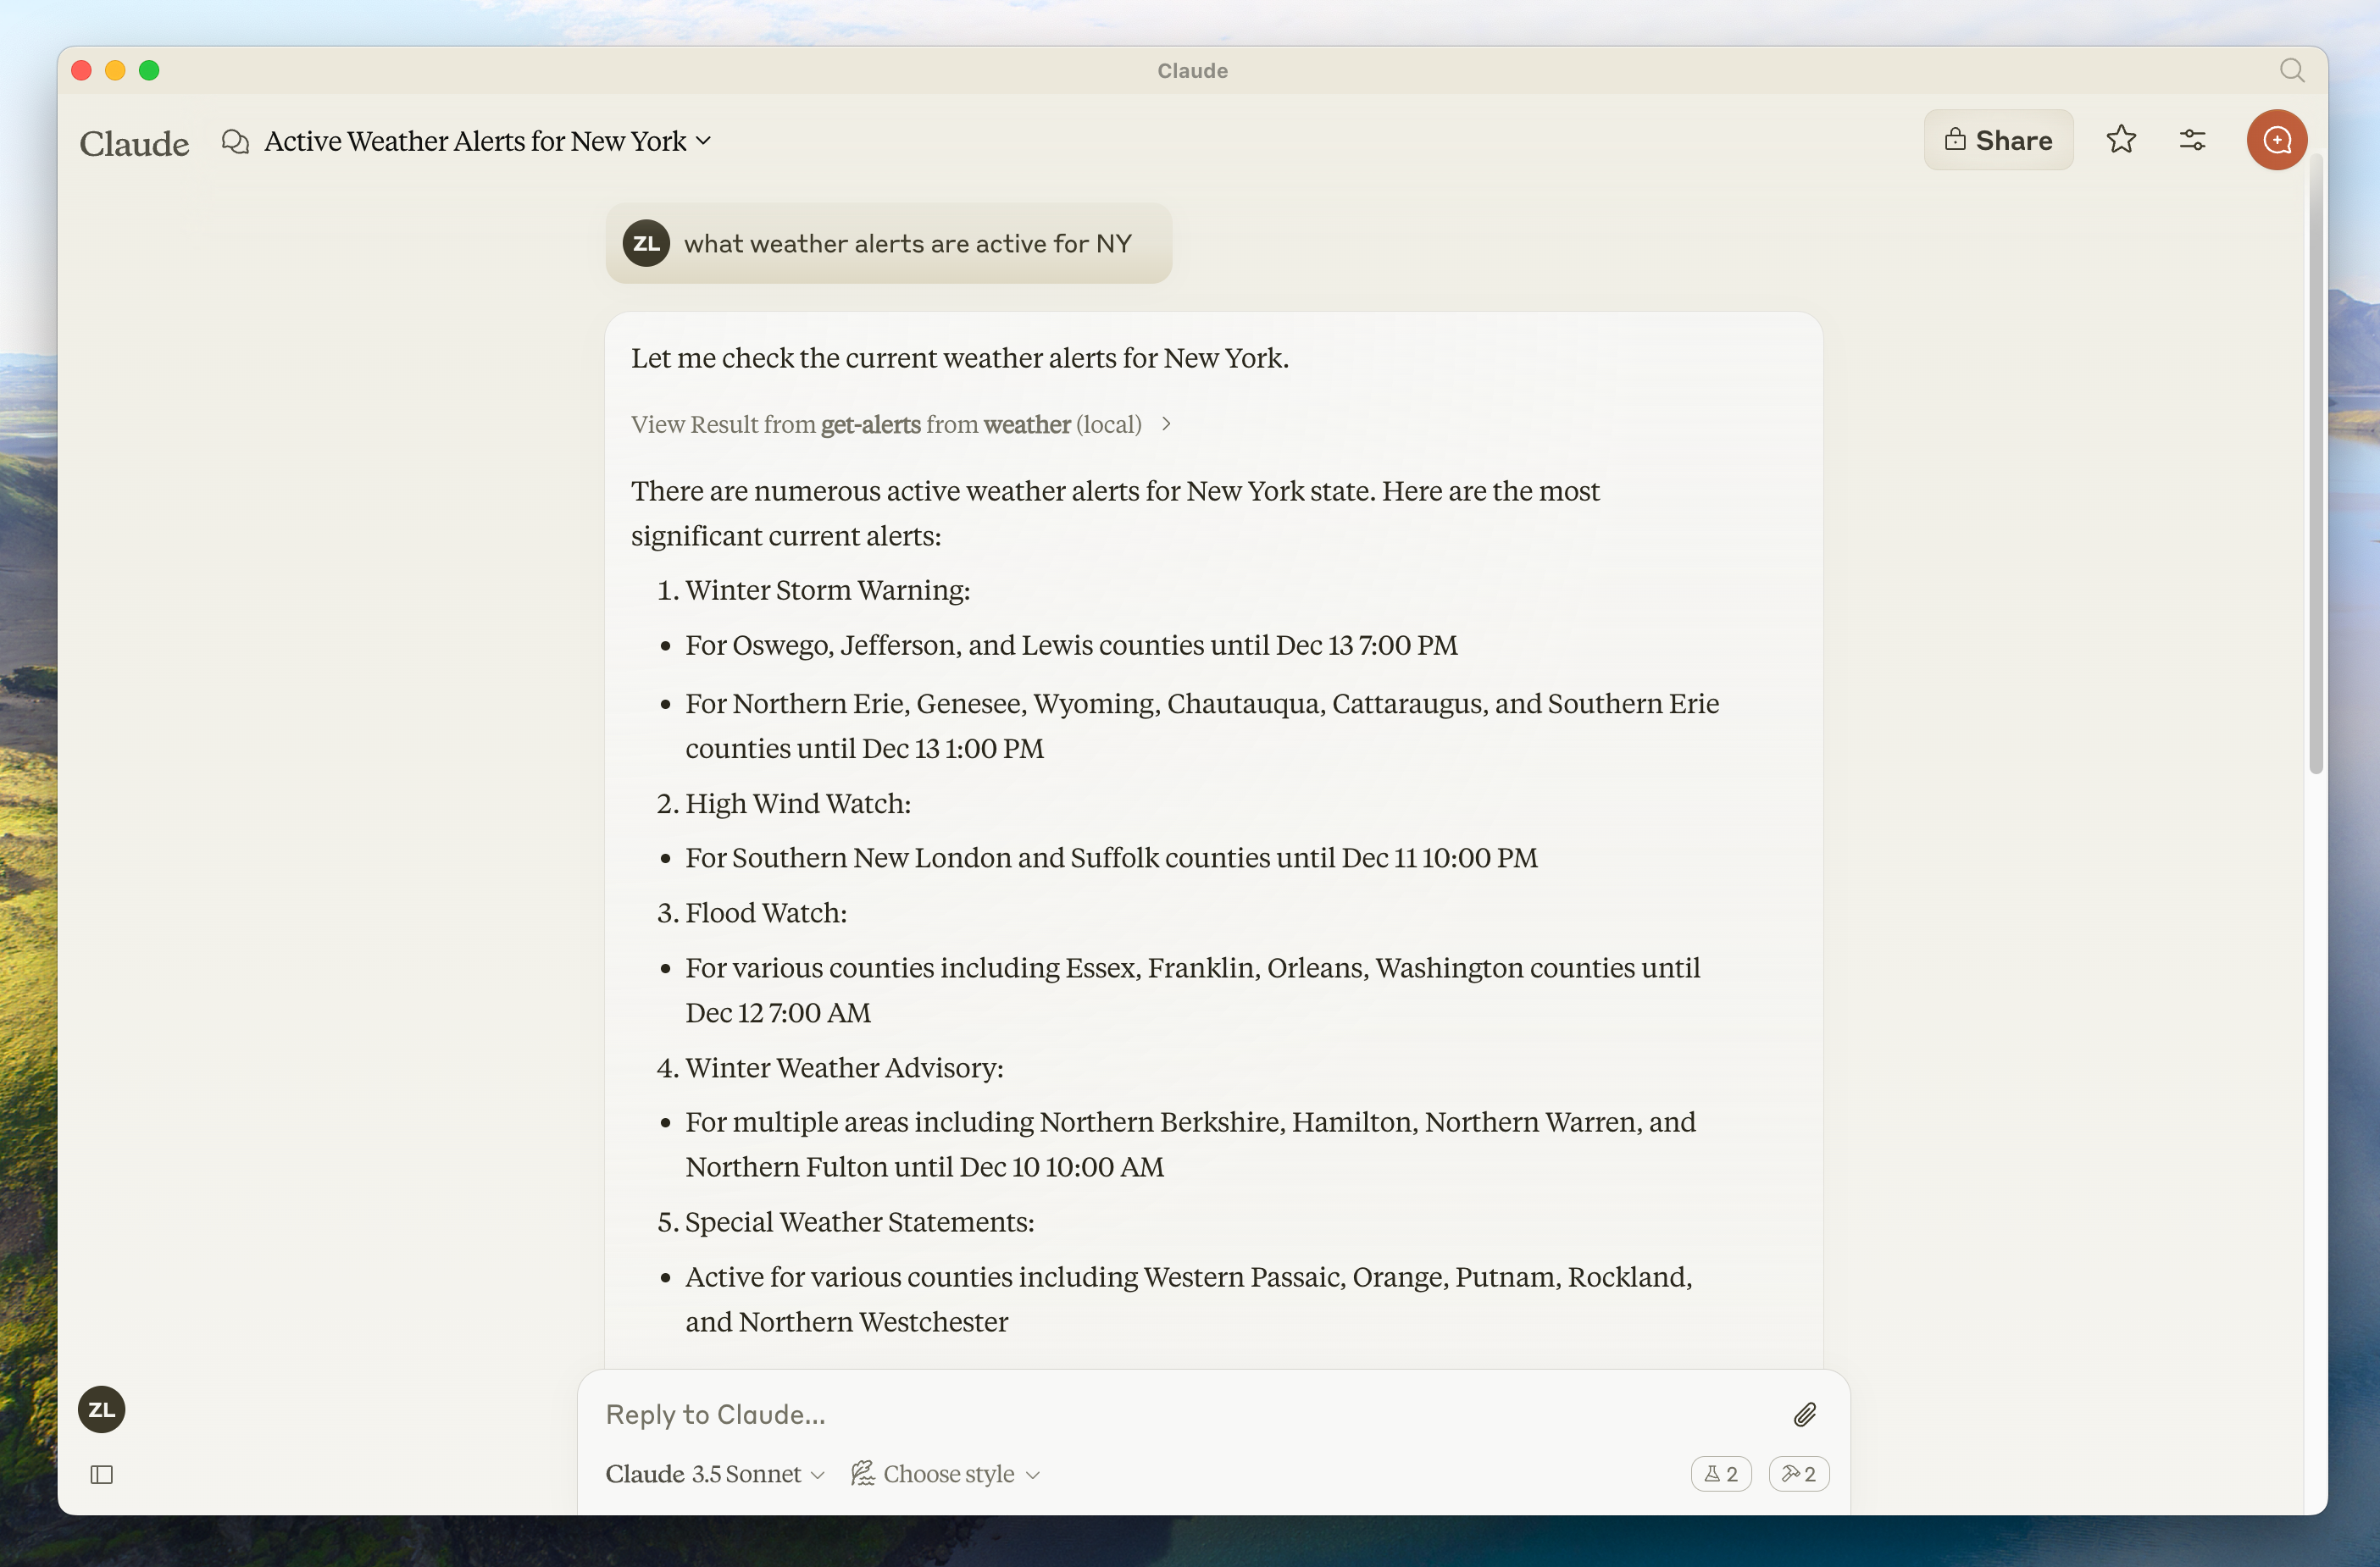
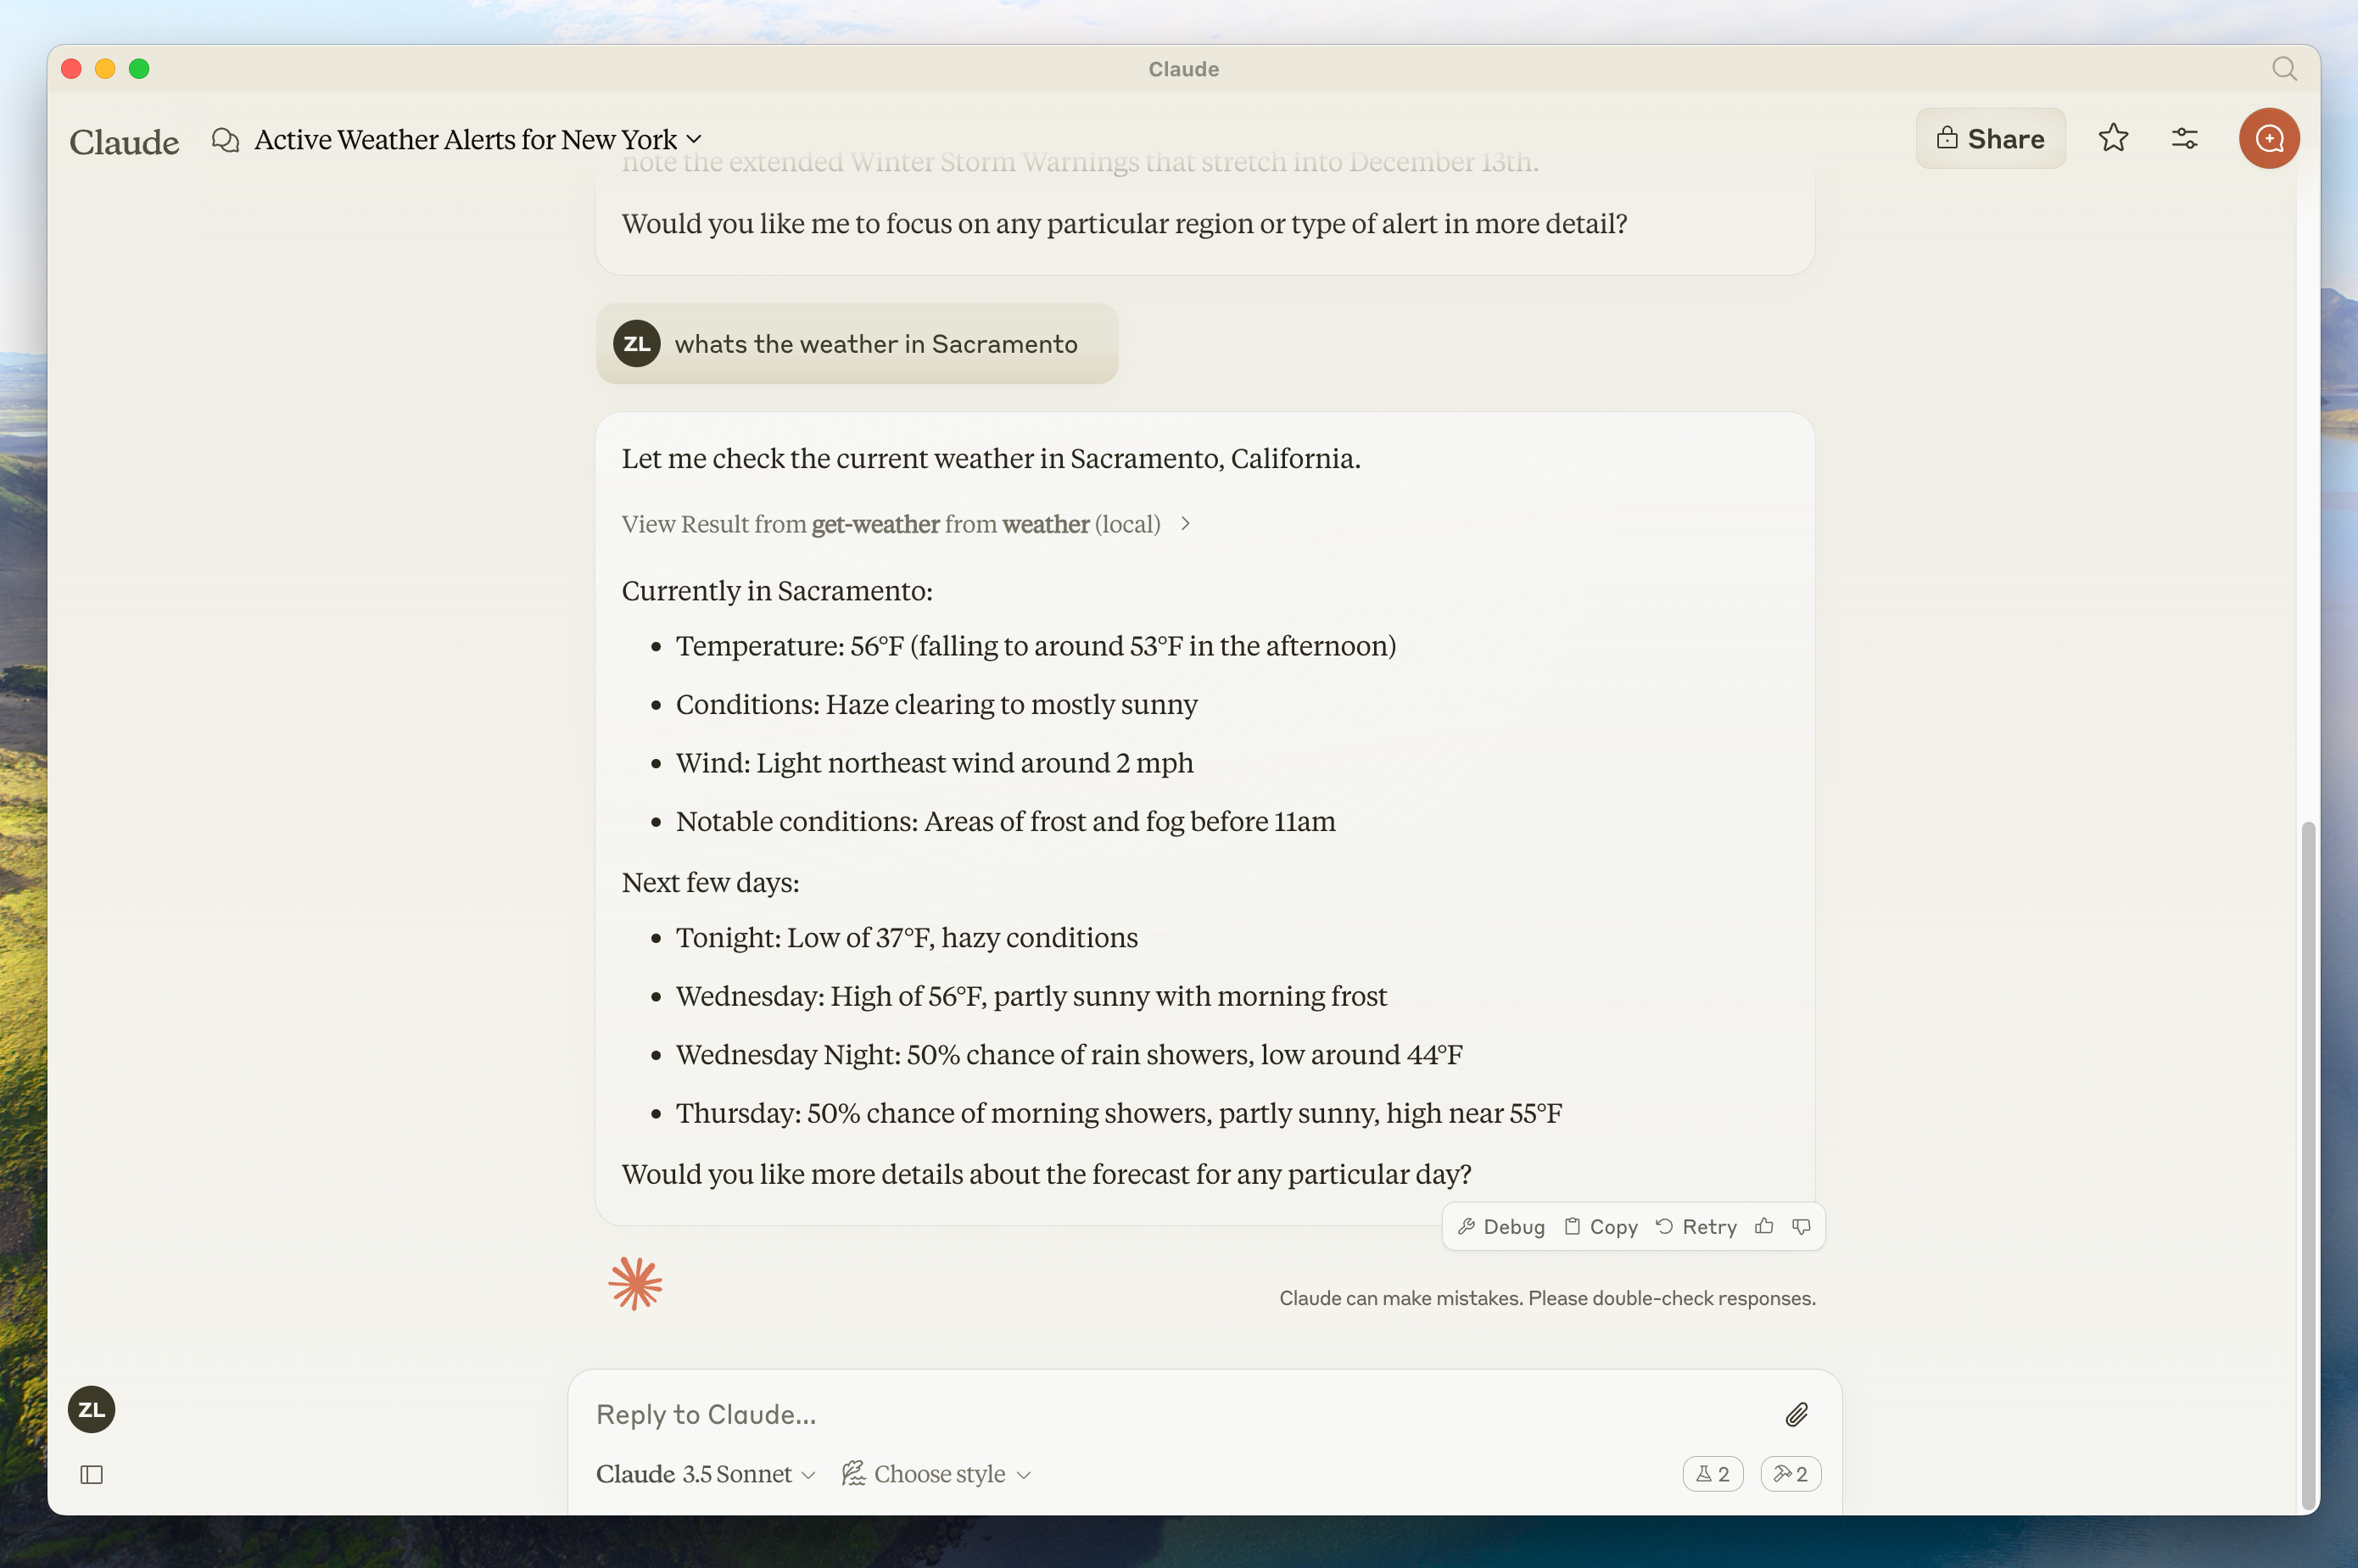
我们将构建一个服务器,提供两个工具:get-alerts 和 get-forecast。然后,我们将服务器连接到 MCP 主机(在这种情况下,是桌面版的 Claude):
核心 MCP 概念
MCP 服务器可以提供三种主要类型的功能:
资源 : 类似文件的数据,可以被客户端读取(如 API 响应或文件内容)
工具 : 可以被LLM调用的功能(需用户批准)
提示 : 帮助用户完成特定任务的预写模板
本教程将主要关注工具。
让我们开始构建我们的天气服务器吧! 你可以在这里找到我们将要构建的完整代码。
前提知识
本快速入门假设您熟悉以下内容:
- Python
- LLMs like Claude
系统要求
已安装 Python 3.10 或更高版本。
您必须使用 Python MCP SDK 1.2.0 或更高版本。
设置你的环境
首先,我们来安装 uv 并设置 Python 项目和环境:
确保之后重启您的终端,以保证 uv 命令能够被识别。
现在,让我们创建并设置我们的项目:
现在让我们深入构建你的服务器。
构建你的服务器
导入包并设置实例
将这些添加到你的 weather.py 文件的顶部:
FastMCP 类使用 Python 类型提示和文档字符串来自动生成工具定义,从而轻松创建和维护 MCP 工具。
辅助函数
接下来,让我们添加用于查询和格式化来自 National Weather Service API 的数据的辅助函数:
实现工具执行
工具执行处理程序负责实际执行每个工具的逻辑。让我们添加它:
运行服务器
最后,我们来初始化并运行服务器:
您的服务器已完成!运行 uv run weather.py 以确认一切正常工作。
现在让我们从现有的 MCP 主机测试你的服务器,Claude for Desktop。
使用 Claude for Desktop 测试您的服务器
Claude for Desktop 尚未在 Linux 上可用。Linux 用户可以继续阅读构建客户端教程,以构建一个连接到我们刚刚构建的服务器的 MCP 客户端。
首先,确保您已安装 Claude for Desktop。 您可以在这里安装最新版本。 如果您已经安装了 Claude for Desktop, 请确保它已更新到最新版本。
我们需要为你想使用的任何 MCP 服务器配置 Claude for Desktop。为此,请在文本编辑器中打开你的 Claude for Desktop 应用配置文件,位置在 ~/Library/Application Support/Claude/claude_desktop_config.json 。如果文件不存在,请确保创建该文件。
例如,如果您已经安装了 VS Code:
然后你将把你的服务器添加到 mcpServers 键中。只有当至少一个服务器配置正确时,Claude for Desktop 中的 MCP 界面元素才会显示。
在这种情况下,我们将添加单个天气服务器,如下所示:
您可能需要在 command 字段中填入 uv 可执行文件的完整路径。您可以通过在 MacOS/Linux 上运行 which uv 或在 Windows 上运行 where uv 来获取此路径。
确保你传入的是服务器的绝对路径。
这告诉 Claude for Desktop:
有一个名为“weather”的 MCP 服务器
通过运行uv --directory /ABSOLUTE/PATH/TO/PARENT/FOLDER/weather run weather.py来启动它
保存文件,并重启 Claude for Desktop。
Let’s get started with building our weather server! You can find the complete code for what we’ll be building here.
Prerequisite knowledge
This quickstart assumes you have familiarity with:
- Python
- LLMs like Claude
System requirements
- Python 3.10 or higher installed.
- You must use the Python MCP SDK 1.2.0 or higher.
Set up your environment
First, let’s install uv and set up our Python project and environment:
Make sure to restart your terminal afterwards to ensure that the uv command gets picked up.
Now, let’s create and set up our project:
Now let’s dive into building your server.
Building your server
Importing packages and setting up the instance
Add these to the top of your weather.py:
The FastMCP class uses Python type hints and docstrings to automatically generate tool definitions, making it easy to create and maintain MCP tools.
Helper functions
Next, let’s add our helper functions for querying and formatting the data from the National Weather Service API:
Implementing tool execution
The tool execution handler is responsible for actually executing the logic of each tool. Let’s add it:
Running the server
Finally, let’s initialize and run the server:
Your server is complete! Run uv run weather.py to confirm that everything’s working.
Let’s now test your server from an existing MCP host, Claude for Desktop.
Testing your server with Claude for Desktop
Claude for Desktop is not yet available on Linux. Linux users can proceed to the Building a client tutorial to build an MCP client that connects to the server we just built.
First, make sure you have Claude for Desktop installed. You can install the latest version here. If you already have Claude for Desktop, make sure it’s updated to the latest version.
We’ll need to configure Claude for Desktop for whichever MCP servers you want to use. To do this, open your Claude for Desktop App configuration at ~/Library/Application Support/Claude/claude_desktop_config.json in a text editor. Make sure to create the file if it doesn’t exist.
For example, if you have VS Code installed:
You’ll then add your servers in the mcpServers key. The MCP UI elements will only show up in Claude for Desktop if at least one server is properly configured.
In this case, we’ll add our single weather server like so:
You may need to put the full path to the uv executable in the command field. You can get this by running which uv on MacOS/Linux or where uv on Windows.
Make sure you pass in the absolute path to your server.
This tells Claude for Desktop:
- There’s an MCP server named “weather”
- To launch it by running
uv --directory /ABSOLUTE/PATH/TO/PARENT/FOLDER/weather run weather.py
Save the file, and restart Claude for Desktop.
Let’s get started with building our weather server! You can find the complete code for what we’ll be building here.
Prerequisite knowledge
This quickstart assumes you have familiarity with:
- TypeScript
- LLMs like Claude
System requirements
For TypeScript, make sure you have the latest version of Node installed.
Set up your environment
First, let’s install Node.js and npm if you haven’t already. You can download them from nodejs.org. Verify your Node.js installation:
For this tutorial, you’ll need Node.js version 16 or higher.
Now, let’s create and set up our project:
Update your package.json to add type: “module” and a build script:
Create a tsconfig.json in the root of your project:
Now let’s dive into building your server.
Building your server
Importing packages and setting up the instance
Add these to the top of your src/index.ts:
Helper functions
Next, let’s add our helper functions for querying and formatting the data from the National Weather Service API:
Implementing tool execution
The tool execution handler is responsible for actually executing the logic of each tool. Let’s add it:
Running the server
Finally, implement the main function to run the server:
Make sure to run npm run build to build your server! This is a very important step in getting your server to connect.
Let’s now test your server from an existing MCP host, Claude for Desktop.
Testing your server with Claude for Desktop
Claude for Desktop is not yet available on Linux. Linux users can proceed to the Building a client tutorial to build an MCP client that connects to the server we just built.
First, make sure you have Claude for Desktop installed. You can install the latest version here. If you already have Claude for Desktop, make sure it’s updated to the latest version.
We’ll need to configure Claude for Desktop for whichever MCP servers you want to use. To do this, open your Claude for Desktop App configuration at ~/Library/Application Support/Claude/claude_desktop_config.json in a text editor. Make sure to create the file if it doesn’t exist.
For example, if you have VS Code installed:
You’ll then add your servers in the mcpServers key. The MCP UI elements will only show up in Claude for Desktop if at least one server is properly configured.
In this case, we’ll add our single weather server like so:
This tells Claude for Desktop:
- There’s an MCP server named “weather”
- Launch it by running
node /ABSOLUTE/PATH/TO/PARENT/FOLDER/weather/build/index.js
Save the file, and restart Claude for Desktop.
This is a quickstart demo based on Spring AI MCP auto-configuration and boot starters. To learn how to create sync and async MCP Servers, manually, consult the Java SDK Server documentation.
Let’s get started with building our weather server! You can find the complete code for what we’ll be building here.
For more information, see the MCP Server Boot Starter reference documentation. For manual MCP Server implementation, refer to the MCP Server Java SDK documentation.
System requirements
- Java 17 or higher installed.
- Spring Boot 3.3.x or higher
Set up your environment
Use the Spring Initializer to bootstrap the project.
You will need to add the following dependencies:
Then configure your application by setting the application properties:
The Server Configuration Properties documents all available properties.
Now let’s dive into building your server.
Building your server
Weather Service
Let’s implement a WeatherService.java that uses a REST client to query the data from the National Weather Service API:
The @Service annotation with auto-register the service in your application context.
The Spring AI @Tool annotation, making it easy to create and maintain MCP tools.
The auto-configuration will automatically register these tools with the MCP server.
Create your Boot Application
Uses the the MethodToolCallbackProvider utils to convert the @Tools into actionable callbacks used by the MCP server.
Running the server
Finally, let’s build the server:
This will generate a mcp-weather-stdio-server-0.0.1-SNAPSHOT.jar file within the target folder.
Let’s now test your server from an existing MCP host, Claude for Desktop.
Testing your server with Claude for Desktop
Claude for Desktop is not yet available on Linux.
First, make sure you have Claude for Desktop installed. You can install the latest version here. If you already have Claude for Desktop, make sure it’s updated to the latest version.
We’ll need to configure Claude for Desktop for whichever MCP servers you want to use.
To do this, open your Claude for Desktop App configuration at ~/Library/Application Support/Claude/claude_desktop_config.json in a text editor.
Make sure to create the file if it doesn’t exist.
For example, if you have VS Code installed:
You’ll then add your servers in the mcpServers key.
The MCP UI elements will only show up in Claude for Desktop if at least one server is properly configured.
In this case, we’ll add our single weather server like so:
Make sure you pass in the absolute path to your server.
This tells Claude for Desktop:
- There’s an MCP server named “my-weather-server”
- To launch it by running
java -jar /ABSOLUTE/PATH/TO/PARENT/FOLDER/mcp-weather-stdio-server-0.0.1-SNAPSHOT.jar
Save the file, and restart Claude for Desktop.
Testing your server with Java client
Create a MCP Client manually
Use the McpClient to connect to the server:
Use MCP Client Boot Starter
Create a new boot starter application using the spring-ai-starter-mcp-client dependency:
and set the spring.ai.mcp.client.stdio.servers-configuration property to point to your claude_desktop_config.json.
You can re-use the existing Anthropic Desktop configuration:
When you start your client application, the auto-configuration will create, automatically MCP clients from the claude_desktop_config.json.
For more information, see the MCP Client Boot Starters reference documentation.
More Java MCP Server examples
The starter-webflux-server demonstrates how to create a MCP server using SSE transport. It showcases how to define and register MCP Tools, Resources, and Prompts, using the Spring Boot’s auto-configuration capabilities.
Let’s get started with building our weather server! You can find the complete code for what we’ll be building here.
Prerequisite knowledge
This quickstart assumes you have familiarity with:
- Kotlin
- LLMs like Claude
System requirements
- Java 17 or higher installed.
Set up your environment
First, let’s install java and gradle if you haven’t already.
You can download java from official Oracle JDK website.
Verify your java installation:
Now, let’s create and set up your project:
After running gradle init, you will be presented with options for creating your project.
Select Application as the project type, Kotlin as the programming language, and Java 17 as the Java version.
Alternatively, you can create a Kotlin application using the IntelliJ IDEA project wizard.
After creating the project, add the following dependencies:
Also, add the following plugins to your build script:
Now let’s dive into building your server.
Building your server
Setting up the instance
Add a server initialization function:
Weather API helper functions
Next, let’s add functions and data classes for querying and converting responses from the National Weather Service API:
Implementing tool execution
The tool execution handler is responsible for actually executing the logic of each tool. Let’s add it:
Running the server
Finally, implement the main function to run the server:
Make sure to run ./gradlew build to build your server. This is a very important step in getting your server to connect.
Let’s now test your server from an existing MCP host, Claude for Desktop.
Testing your server with Claude for Desktop
Claude for Desktop is not yet available on Linux. Linux users can proceed to the Building a client tutorial to build an MCP client that connects to the server we just built.
First, make sure you have Claude for Desktop installed. You can install the latest version here. If you already have Claude for Desktop, make sure it’s updated to the latest version.
We’ll need to configure Claude for Desktop for whichever MCP servers you want to use.
To do this, open your Claude for Desktop App configuration at ~/Library/Application Support/Claude/claude_desktop_config.json in a text editor.
Make sure to create the file if it doesn’t exist.
For example, if you have VS Code installed:
You’ll then add your servers in the mcpServers key.
The MCP UI elements will only show up in Claude for Desktop if at least one server is properly configured.
In this case, we’ll add our single weather server like so:
This tells Claude for Desktop:
- There’s an MCP server named “weather”
- Launch it by running
java -jar /ABSOLUTE/PATH/TO/PARENT/FOLDER/weather/build/libs/weather-0.1.0-all.jar
Save the file, and restart Claude for Desktop.
Let’s get started with building our weather server! You can find the complete code for what we’ll be building here.
Prerequisite knowledge
This quickstart assumes you have familiarity with:
- C#
- LLMs like Claude
- .NET 8 or higher
System requirements
- .NET 8 SDK or higher installed.
Set up your environment
First, let’s install dotnet if you haven’t already. You can download dotnet from official Microsoft .NET website. Verify your dotnet installation:
Now, let’s create and set up your project:
After running dotnet new console, you will be presented with a new C# project.
You can open the project in your favorite IDE, such as Visual Studio or Rider.
Alternatively, you can create a C# application using the Visual Studio project wizard.
After creating the project, add NuGet package for the Model Context Protocol SDK and hosting:
Now let’s dive into building your server.
Building your server
Open the Program.cs file in your project and replace its contents with the following code:
When creating the ApplicationHostBuilder, ensure you use CreateEmptyApplicationBuilder instead of CreateDefaultBuilder. This ensures that the server does not write any additional messages to the console. This is only neccessary for servers using STDIO transport.
This code sets up a basic console application that uses the Model Context Protocol SDK to create an MCP server with standard I/O transport.
Weather API helper functions
Next, define a class with the tool execution handlers for querying and converting responses from the National Weather Service API:
Running the server
Finally, run the server using the following command:
This will start the server and listen for incoming requests on standard input/output.
Testing your server with Claude for Desktop
Claude for Desktop is not yet available on Linux. Linux users can proceed to the Building a client tutorial to build an MCP client that connects to the server we just built.
First, make sure you have Claude for Desktop installed. You can install the latest version
here. If you already have Claude for Desktop, make sure it’s updated to the latest version.
We’ll need to configure Claude for Desktop for whichever MCP servers you want to use. To do this, open your Claude for Desktop App configuration at ~/Library/Application Support/Claude/claude_desktop_config.json in a text editor. Make sure to create the file if it doesn’t exist.
For example, if you have VS Code installed:
You’ll then add your servers in the mcpServers key. The MCP UI elements will only show up in Claude for Desktop if at least one server is properly configured.
In this case, we’ll add our single weather server like so:
This tells Claude for Desktop:
- There’s an MCP server named “weather”
- Launch it by running
dotnet run /ABSOLUTE/PATH/TO/PROJECTSave the file, and restart Claude for Desktop.
使用命令进行测试
确保桌面版 Claude 识别到我们在 weather 服务器中公开的两个工具。您可以通过查找锤子 ![]() 图标来完成此操作:
图标来完成此操作:
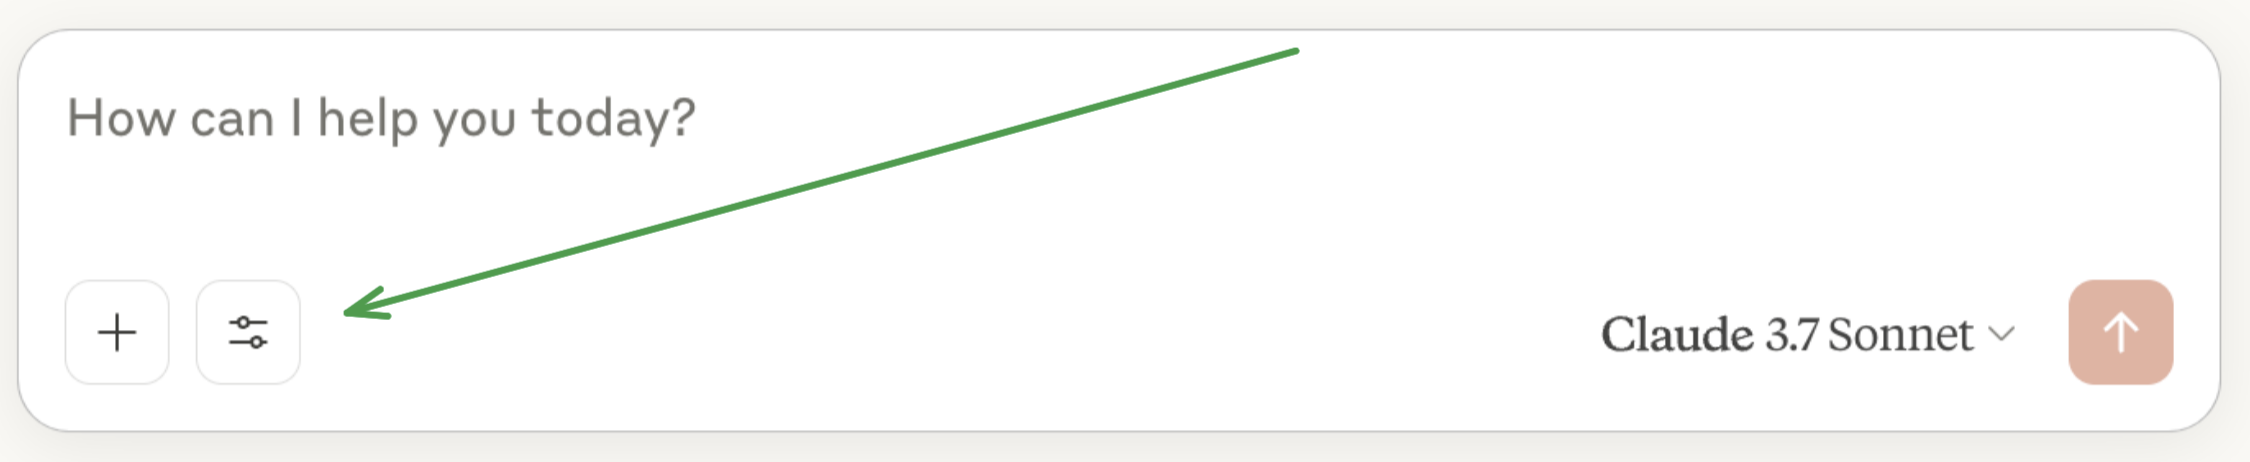
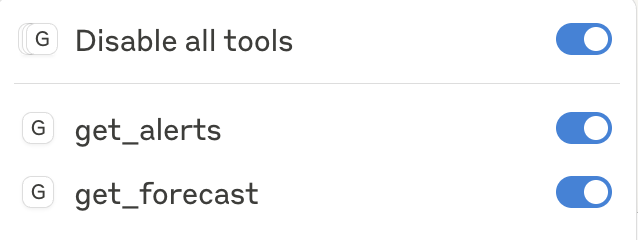
点击锤子图标后,你应该会看到列出两个工具:
如果你的服务器没有被 Claude for Desktop 识别,请前往故障排除部分以获取调试建议。
如果锤子图标已经出现,您现在可以通过在 Claude for Desktop 中运行以下命令来测试您的服务器:
萨克拉门托的天气怎么样?
德克萨斯州有哪些活跃的天气警报?
由于这是美国国家气象服务,查询仅适用于美国地区。
“在背后发生了什么”
当你提出一个问题时:
客户端将你的问题发送给了 Claude
Claude 分析可用的工具并决定使用哪一个(些)
客户端通过 MCP 服务器执行选定的工具
结果被发送回 Claude
克劳德生成一个自然语言响应
响应已显示给您!
故障排查
要进行更高级的故障排除,请查看我们的指南:Debugging MCP